Showing posts with label storage. Show all posts

Sunday, December 12, 2010

Christmas Cards

They are starting to come... all of those fun Christmas Cards! I love getting Christmas cards... especially from people I haven't seen in a long time! I used to throw them away at the end of the year.... gasp! But a couple of years ago, I decided to save them. It's fun to see how families change and grow over the years. And it also helps me to not forget someone on my Christmas card list.
I didn't want to put them in a photo album... I wanted to save some space. So, I made an envelope to put them in. I used my Platin Schoolbook Cartridge on my Cricut and cut out an envelope. To make it big enough to hold all of my cards, I actually sewed two 12x12 pieces of cardstock together to make a 24"x12" piece of paper. Then I cut the envelope as big as it would go! The sewing is on the back and it adds a cute effect. Last year I jazzed it up a little by putting my own families photo card on the front. I made a tie closure on the back by using 2 eyelets and a card stock circle. (Up-close view) If you don't have a cricut, you could find an envelope template online or just purchase a manila envelope and decorate it!
-Anisa

Friday, July 23, 2010

Button/Embellishment Storage

I have been trying to make my scrapbooking supplies more mobile... so that I can scrapbook someplace other than in my craft room. I have always used these divided containers for my button and embellishment storage.
But they drive me crazy!!! I stick them in my craft bag and all the buttons slide around and get mixed up. So, I put my thinking cap on and came up with a solution!!! I cut a piece of chipboard the size of the lid. Then I cut a piece of batting the same size. Then I cut a piece of fabric about 1" larger around all sides. I then simply hot glued it together and glued it inside the lid of the box. Ta da!!! It totally works!!! No more sliding around and mixing up of buttons. It is a tight squeeze to close it, but that's okay!!!
To hide the back side of the chipboard, I cut a piece of fabric and modpodged it on the front. Then I modpodged a border of scrapbook paper around the edge and stamped acrylic paint to label what was inside. I'm sure I could have decorated and embellished the outside a little better, but oh well!!! The important thing is that it is totally functional and solves the problem of everything getting mixed up inside!!!
-Anisa

Wednesday, June 30, 2010

Anisa's Craft Room

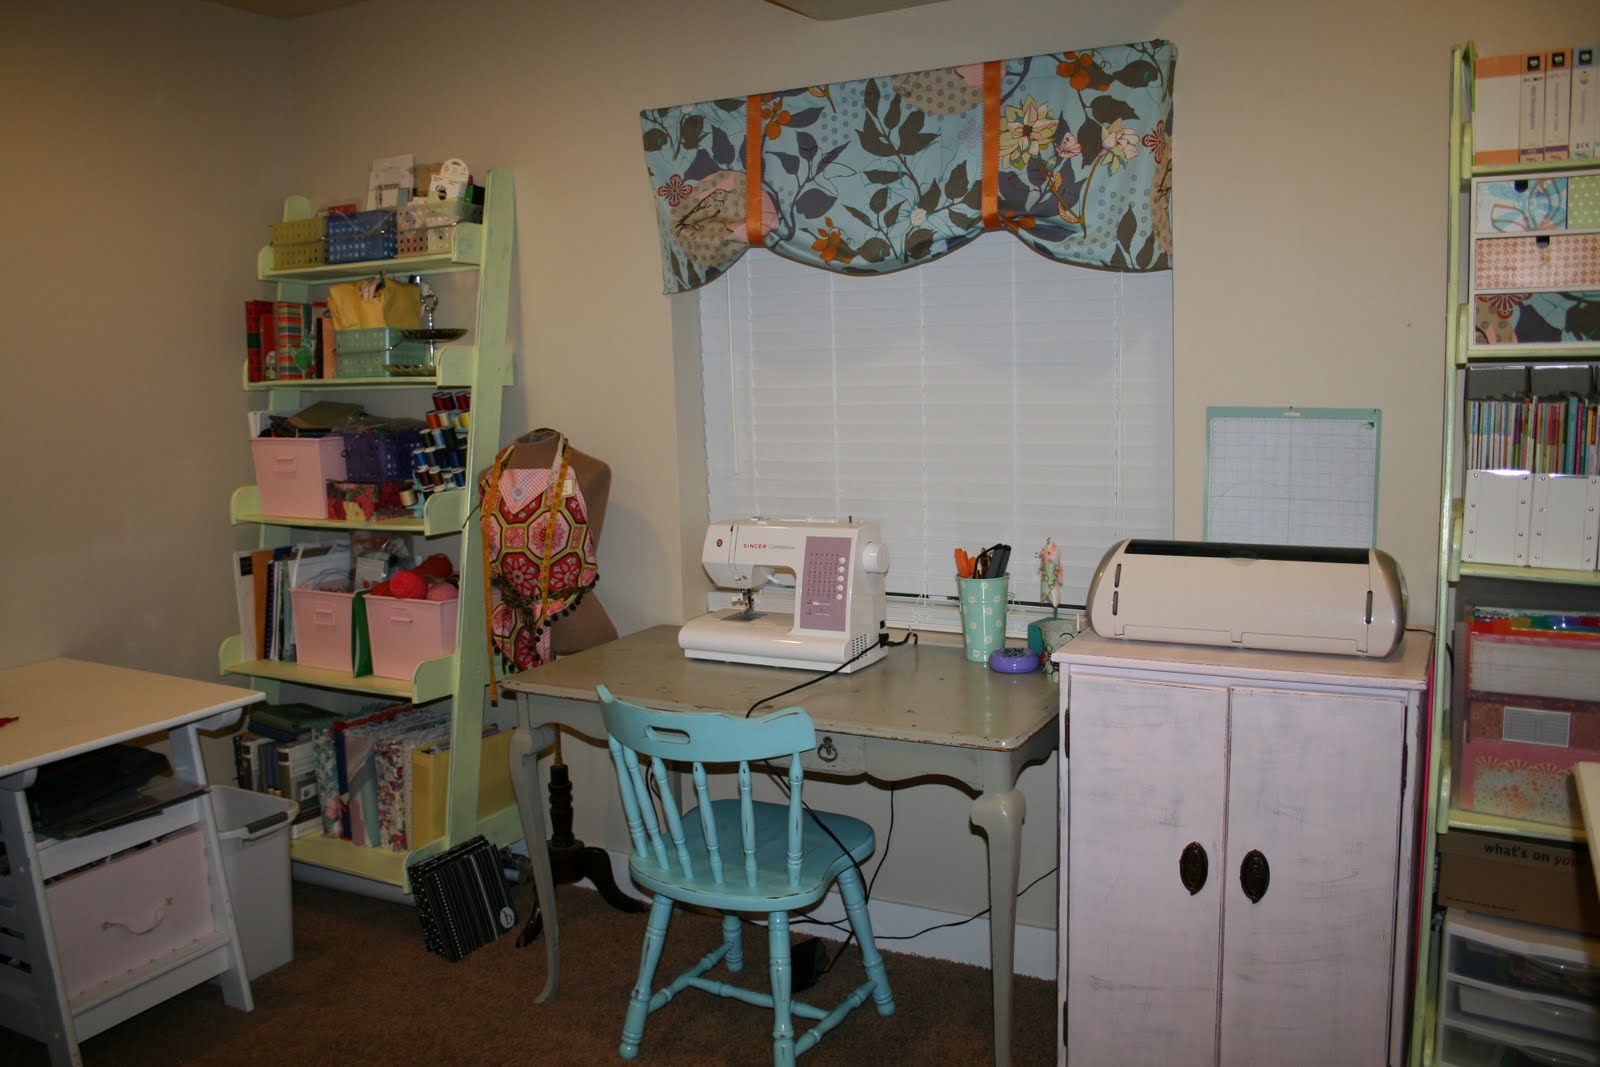
I have been waiting until I get my craft room perfectly organized exactly how I want it to post pictures of it. Well, folks, it's never going to be exactly how I want it, so I think I'll just post it any way!!! I at least cleaned it up a little:)
This side of the room is my scrapbooking side. I don't like to sit down when I scrapbook so I wanted something counter-top height. So I purchased 4 storage cubes from my local Robert's Crafts. (I'm sorry but I can't remember the brand of the storage cubes). You can buy them in several combinations. I wanted drawers on the bottom and the top to have cupboard doors... but I haven't ever gotten around to buying the doors. I bought a piece of wood for the top at Lowe's and painted it white. The paper stacker underneath was a yard sale purchase. I bought a bar stool without a back at a thrift store and painted it. That way I can push it out of the way most of the time. I have curtain rods hanging above the desk that I can use to display fun crafts or albums. My buttons are organized with a spice rack from Ikea. I got buckets from the dollar section of Target to hold my ribbon scraps. This side of the room is mostly my sewing station. My pink cabinet holds my Cricut and supplies. This side of the room I like to have mostly open. That way I have a place to work when I'm cutting out fabric or when I have a friend over to scrapbook. On the left you will notice a shoe hanger on the wall. You can purchase these for about $5 at Target or Walmart. I have these things all over my house... usually on the back of the door. In my pantry, it holds ziplocs bags, kool aid pouches, popcorn bags, etc.... great way to store stuff. This side of the room is just mostly storage. I love this fun cabinet I bought at a yard sale. I got my small ironing board at Ikea so I can iron fabric projects or bent ribbon. And the shelves on the wall are a great place to display some of my craft projects.

I love my adorable craft room.... it's my place to decorate something girly:) Do you have a craft room... or crafting space? We'd love to see it! Email us pictures at twiddlethumbs@rocketmail.com

-Anisa

Friday, May 14, 2010

Jewelry Dilemma

So, we had a yard sale this past weekend. My mom was going to be in town, so she said that she would bring up my Grandma's old jewelry so that we could put it in the garage sale. I was in a rush, but I quickly opened the "jewelry box" and found countless clip-on earrings inside. Seriously... how could I sell those awesome earrings? My grandma didn't have a lot of money so they aren't expensive real jewels, but they are totally cool, vintage clip-on earrings, nevertheless.

I even found a pendant in there from when my Grandma was the fire chief of the first all women's fire department in her small town of Kanarraville, UT. That thing is priceless... not garage sale material.

So, here is where I need your help!!! What do I do with all of these earrings??? Do I just stick them in my cedar chest and pull them out to look at every few years? Or do I make something out of them? And what do I make? Please leave a comment and give me suggestions!!! This is my grandma's so called "jewelry box." I for sure know what to do with that! It holds 12x12 paper. I've been wanting something to organize my scraps.... yeah! I think this will work.

-Anisa

Wednesday, February 3, 2010

Craft room Storage Crates

I have a cute white desk in my craft room that I purchased on Target.com a few years ago. I love the style and simplicity of it, but the desk has open shelves on it. The open shelves are very deep and I have never been able to find the right size of baskets to fit the shelves. So, considering the fact that I love to cut wood, I decided I was going to make my own wooden crates... that way I could make them to perfectly fit under my desk.
And they fit perfectly.... it's almost scary. I only made three and now looking at the pictures, I'm wondering if I should make one more. I have my Cricut mats and paper trimmers on the top shelf and they kind of hang out so they wouldn't fit in a crate. I guess I could find somewhere else to store them so that I could have a perfectly even desk storage. I had so much fun building them. I love it when I get to use tools and saws without my hubby's help... it's even better that he's willing to clean up my sawdust mess:) My ultimate goal is to get this craft room organized enough that I can take pictures of the whole room and post them for you... one step at a time.... Here's a preview of one wall.

Tuesday, October 27, 2009

Product Challenge: Buckets

Our product challenge this month was buckets! (I can't lie to you, I was super excited because I already had a project done with buckets that I hadn't posted yet). So all I had to do was take a picture. Do you love the dollar section at Target as much as I do? Well, they often have buckets. So, awhile back I bought several buckets at Target to keep my ribbon in. I made a template out of paper for the bucket, then used my scraps of scrapbook paper and covered the buckets with every color of the rainbow... and then some! I then tied little scraps of ribbon on the handle of each bucket. This helped organize my obsession with ribbon (well, at least the smaller pieces. I have the full rolls of ribbon just in a cupboard... I really like ribbon). Hey, let me know if you want to see pics of my whole craft room sometime and I'll try to clean it up to make a post!!! Just leave me a comment.

So, the ribbon ones are totally cute, but you can't forget my favorite bucket of all..... my thread bucket. I love this thing. I keep it next to my sewing machine so when I clip off the thread I have a quick place to throw it!!! -Anisa:)

My bucket project ended up not being a craft but an organizational project. I had been reading Pretty Organized Palace's blog and one post in particular caught my attention. She was sharing some fun ways to cozy up the home for fall and winter. With my inspiration starting there, I headed to my local Hobby Lobby and purchased this large bucket/basket. At home I filled it with all my yummy yarn for crocheting (and one day hopefully knitting) and placed it by the fireplace. I love how it makes my family room just that much more comfy cozy with the bonus I have yarn storage in plain sight.

-Ang

Check out these darling buckets that one of our readers... Shellie... sent into us. Super cute storage. Here's what she says about them,

"Here is what I have been doing with buckets. I only have 3 done. I still want a ribbon one and thread etc… I just bought some for a couple of dollars and spray painted them, cut out vinyl on my Cricut for the letter."

Way to go Shellie!