Showing posts with label wire. Show all posts

Wednesday, September 2, 2009

I'm a little obsessed with Owls!!!

Okay, so after last month's wood craft workshops at my home, I got such a huge response to owls, that I went a little crazy.... I made a cute yard stake for my little boy's silent auction at his school (sorry, I donated it before I thought to take a picture....I guess I'll have to make another one). And my sister-in-law and I made this adorable wreath! I just love it. It's already on my front door weather it's fall or not!!!
I have been having fun designing a lot of my own wood crafts. You can find some of them finished or unfinished in my Etsy shop The Craft Menagerie (link is in our side bar). I will gradually be adding finished and unfinished products to my shop. If you are local, stay tuned for my October-themed crafts which I will be doing at the end of September.
-Anisa

Wednesday, April 22, 2009

1 Craft-3 Ways: Spring Accessories

The snow has finally melted. The grass is greening up. Flowers are blooming. Winter is OVER!!Being women, what better way to celebrate spring than by adding a few new accessories to our collections?! That's what we thought, too. I've been having a bead craving lately, and thanks to Bead Style Magazine, I found the cutest free pattern. I did have to become a "member" to get the pattern I wanted, but that was also free. It took me a good while to do this project, but in the end it was totally worth it! I love working with beads and wire instead of just the stretchy bead cord or even fishing line. There are a few basic techniques to learn such as making a basic loop, a wrapped loop, different knots, etc. (Bead Style has a great how-to basics section in the back of every issue.) It didn't take long at all to learn them, and I've been amazed at all the fun new looks I can try now. -Ang
I guess I couldn't keep away from the flowers either and used polymer clay to make a keychain for me to carry around. It was made from a simple cane pinched into a petal shape and then cut into small slices and layered around a shape of my own design made of scrap clay. I baked it and glued the two halves together, leaving a small side slit to get a photo of my family in there. The photo on the right is the best representation of the true colors. Thanks Anisa for lending me a camera! Happy Spring!   
-Cami
Okay, so I'm not an accessories person.  I don't wear jewelry... I don't even wear my wedding ring.  I toiled over ideas of what to do for this craft for a long time.  Then I saw my niece with a cute headband on when she was swimming.  I thought it would be fun to wear a headband since I always put my hair up anyway.  It would give me a little bit of style.  I found a tutorial on Chocolate on my Cranium that was super easy! -Anisa

Wednesday, March 18, 2009

Button Bouquet

Ahhhhh, spring is in the air!  I have been wanting to just be outside working in the yard. I can see the tippy tops of my tulips poking through the ground.
But, since it's a little too early to get started planting flowers, I thought I'd make a cute button bouquet for my craft room.
Here is a tutorial and another one here.  Both are a little different from mine.

Friday, December 12, 2008

Family Tree

During this time of year our hearts turn to our families and when I saw these simple, excellent trees (just $5!) at IKEA, I instantly knew what I wanted to do with them!
I started out by making a family tree for myself, but then I realized that my mother-in-law would absolutely love this and I set out to make one for her first.
I began by drawing the leaves on regular white card stock in waterproof ink. Since I did it free hand, I had to re-do a lot, but for just 18 leaves it wasn't a big deal. Then I wrote the name and birth year of each person on the family tree (using the waterproof pen).
I also made a plaque with my husband and his siblings for the trunk.
Next I used water colored pencils (3 of them) to color in the shading on leaves. Watercolor pencil marks can be washed over with water on a brush to blend the colors and I used this technique. After the leaves were dry, I pressed them into a clear embossing pad and used Ultra Thick Embossing Enamel (UTEE) and a heat gun to give the leaves a gorgeous shine as well as make them stronger.
To hang them on the tree, I used a box cutter to cut small grooves into the plastic coating on the tree. I looped wire through a small hole on the leaf stem, added some beads and tied a simple square knot at the back. I set the wire loops into the grooves and added some super hold glue with a really fine tipped tube. Voila! A family tree! (now, how am I going to wrap this thing?)
--C

Tuesday, November 11, 2008

Wings & Things

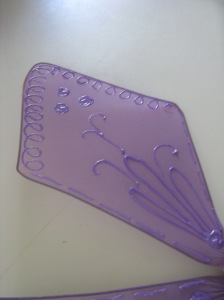
Halloween is coming. And fast. My sweet little six year old loves anything princess and detests anything not "pretty" costume-wise (i.e. witches). I am growing tired of the Disney Princess road. I was thumbing through various family-friendly magazines and websites and came across a few different ideas for fairy wings. For my girl, it was love at first sight. For me, it was yet another excuse to test my creativity. So for a quick idea for something fun, girly, and not Disney for your little princess, try these pretty little fairy wings. Materials needed:
  • 4 wire hangers
  • wire cutters
  • pliers or very strong hands
  • 4 knee high nylons
  • duct tape
  • spray paint
  • glitter, fabric paint, etc.
  • 2 yards grosgrain ribbon in coordinating color
Step 1: Using the wire cutters, cut the hook part off each hanger. Step 2: Gripping hanger like a bow (as in bow and arrow) and pull. This will give you the diamond shape you see below Step 3: Bend the neck of the hangers 1 and 2 enough that you can duct tape them easily together. Repeat with hangers 3 and 4. Step 4: Duct tape 2 hangers together. Once you have 2 sets of wings, duct tape the two sets. Step 5: Slip one knee-high nylon over each wing and tie in a knot. At this point, I chose to tie those ends to each other Step 6: Spray paint your desired color. Give it a good coat and you shouldn't have to do more than 1. (I didn't even have to spray the backside and bonus, it dried very quickly.) Step 7: Add your embellishments-glitter spray, fabric/glitter paint for details, etc. Step 8: Cut ribbon into two pieces, 1-yd each. Fold in half. Hot glue loose ends to where you've duct-taped the hangers together. Make a loop and glue the folded ended on top of the loose ends. Repeat with second strand of ribbon. These are the arm holes. Step 9. Cover the center with flowers to hide all the knots and duct tape. Voila! A simple, inexpensive set of wings for your little fairy! **UPDATE** The top wings kept flopping down by the 3rd party/event we went to. To fix, use a little hot glue to adhere a small portion of the shoulder straps to the wings. I did it maybe an inch or 2 above were the hangers all come together. We haven't had a problem since!