Showing posts with label Gift Ideas. Show all posts

Friday, December 27, 2013

Dad's Craft, too!

Hey, blogger land!  Long time no see!  Maybe we'll start posting here again.  I'm feeling nostalgic for traditional blogging. :)

This Christmas our family was surprised by not one, but TWO homemade gifts.  From our Grandpas.  Awesome!

The first is this plaque my father-in-law made for each family of his favorite saying.  Not only is it beautiful, but also sentimental.  He made it from a walnut tree cut down from his Mom's historical home in Manti, Utah.  I love sentimental gifts.

The second was the big shocker.  My dad made each of us our own walking stick.  My dad hardly does his own Christmas shopping let alone MAKE his own gifts.  He found these great sticks on different camping trips/outings with my mom and their friends.  He did all the work, including almost all of the bead work.  (My mom did have to show him how to do the beads. :) He was so excited to show us how unique each stick was and the beauty of each piece of wood.

Dads really are the best. :)

Sunday, January 23, 2011

Cloth Diaper Burp Cloths

It's been a busy week for me... and I've had sick kids... no fun. I needed to get a baby shower gift for my friend, Rachel... but just didn't really have time. I live about 20-25 minutes from Target, Old Navy, etc.... and just wasn't up for a drive clear across town. Plus, I really like to make home made gifts for my friends. On my way home from work, I stopped by a little boutique and saw burp cloths... they wanted $20 for them!!!! I had actually purchased some cloth diapers to make burp cloths to go with this blanket... so, I thought, I guess I'll make some girl ones for Rachel. I had minky left over from the blanket... and this super cute fabric that I had bought for a project for my sister in law...(that I never made)... So, I started cutting, and sewing.... I'm into appliqué right now.... so I appliquéd a flower on the minky to give it a little something extra... Here are pics of each burp cloth... (I didn't do a tutorial for the burp cloths, but I found a tutorial online at Chickpea Sewing Studio that is similar to the same technique that I used) Here's a little tip about your bobbin thread.... it is the thread that shows on the back. So, when doing a project like this, use white bobbin thread... then the thread doesn't show! Here are the burp cloths all wrapped up... I totally love how they turned out and I hope she likes them too! -Anisa

(PS Shellie... I am still going to make you some to go with the owl blanket)

Saturday, January 1, 2011

A few homemade Christmas gifts

In my family, we rotate who we give Christmas gifts to. When I asked my brother and sister-in-law what they wanted, they told me a gift card to Walmart. How boring! But, I know better than to give my brother anything other than what he asked for. However, I just couldn't give them a gift card without giving them some cute hand made gifts to go with it. They have a little girl who is 3 1/2. So, I thought I would make a cute hair clip for her.But, they were expecting a baby boy (he was born Dec. 23rd). I couldn't figure out what to make him. I debated on burp cloths and bibs.... but I finally decided on a binky holder. I just put a simple brad on the end to hide the clip... and I love it when I can purchase something for a gift for someone and have a bunch of fun stuff left over for me! One of the fun parts of giving gifts is the packaging. One of the things that makes it cute is when you use something from the gift to decorate the packaging... I used the ribbon from the binky clip and a scrap of fabric from the hair clip to tie the cellophane bags. It adds a fun touch to the gifts. Our little nephew has been in Primary Children's hospital with an infection and we haven't even been able to meet him yet! He is improving a ton but won't be out until the round of antibiotics is over (in another week). I can't wait to meet him! In the meantime, we are baby sitting my niece... I have been making more hair flowers and have plans to make a few more.... I don't get the chance to make girly stuff all that often!

I hope everyone had a Merry Christmas and a Happy New Year!!!

-Anisa

Sunday, November 21, 2010

Christmas Crafting: What are YOU working on?

I've been diligently working on two of my Christmas gifts for family members and I am determined to finish these two before starting any new ones that I have on my list. It got me wondering what everyone out there is working on so far for Christmas (gifts or decor). Take a minute to click on the poll on the sidebar to the right and let us know! -C

Wednesday, May 5, 2010

Chained Daisy Pin

It's Teacher Appreciation week at my son's school and we LOVE his teacher. When he told me that her favorite flower was a daisy, I wanted to do something crafty as a little gift for her. I came up with the Chained Daisy Pin. First of all, I crocheted this daisy (found in 100 Flowers to Knit and Crochet by Lesley Stanfield)Instructions: Chain 6 with yellow yarn and join with slip stitch into a ring. Chain 1 then 11 single crochet in ring (12 stitches). Using white yarn continue [11 chain, slip stitch in next single crochet] twelve times in each single crochet from the first round. Fasten off and weave in ends. Next, I lightly misted the flower with water and gently stretched and shaped the petals to how I want them to look and let that dry flat. I cut pieces of moss colored felt freehand: one petal and two circles for mounting the flower. I used embroidery floss (1 and 2 ply) to bring it all together.

Taking the larger circle, I sewed on the brooch mount.

You may be tempted to use hot glue.

Don't.

Hot glue doesn't like metal, long term. Sewing holds it closer and looks so much better.Sandwich the leaf (make sure it's where you want it in relation to the brooch mounting pin) in between the two circles and whipstitch around the smaller circle, joining all three felt pieces.When flower is dry, use tiny stitches with floss to attach petals to the felt. You want the petal tips to have free movement, so stitch around the edge of the larger circle and leave them free. Just make sure you stitch into each side of each petal to keep it lying flat.Here you have it!

I used a size G crochet hook and worsted weight yarn. Any variations with make the flower larger or smaller.

--C

Friday, December 11, 2009

Quick, Festive Neighbor gifts

I am always up for a quick and easy gift for friends and neighbors, so I thought I'd share what I did last year.
I started with some cellophane bags filled with hand dipped chocolate pretzels and homemade Oreo truffles. (Hold on, I'm drooling just thinking about it. Okay. All better.) The bag looked pretty plain until I snipped some twigs off my pine tree and swiped some candy canes from our holiday stash (fresh ones and stale. lol.) It turned out lovely and I spent next to nothing on gift wrapping.
Moral of the story? Go raid your backyard (or your neighbor's-just kidding) for something fun and festive to add to your gift wrapping and you'll have thriftiness, elegance, creativity, and festiveness all rolled into one!
Oh-and in case you have never had an Oreo truffle, here is the simple, simple, mouthwatering recipe:
Oreo Truffles
1 pkg Oreos
1- 8oz pkg softened cream cheese
melting chocolates
Finely crush Oreos. Using a mixer, mix in the cream cheese. Roll into balls and freeze on lined baking sheet for 15 minutes. Melt your chocolates. Dip each Oreo ball into chocolate and lay on wax paper to harden. Enjoy!!
Ang

Tuesday, December 8, 2009

Countdown: Baby, it's Cold Outside, but we know you'll go shopping anyway

It is currently 7 degrees Fahrenheit in Utah, but you can warm your friends' and neighbors' hearts each season through thoughtful gifts. In continuing our Countdown with Crafts, here are a few ideas from this week's ads.
  • If you've been crafting in the kitchen and need something to put your goodies in, Michaels had really cute Christmas baskets for 50% off.
  • While I was there I bought acrylic paints for just 69 cents each. My mom has wanted me to paint her a whimsical childhood-related painting for awhile so it's a great thing that they also had artist's back-stapled traditional canvas on sale for 40% off as well!
  • Roberts has all their unfinished wood for 40% off, if you want another place to use acrylic paint.
  • If you make jewelry for others then Jo-Ann has 50% off Jewelry Making bead boards and a buy one, get one 50% off deal on Blue Moon beads (though Roberts has Blue Moon for 30% off)
  • Neighbor gift idea: both Roberts and Michaels has their ornaments 50% off.

    Buy a pack of the large clear glass ones. Funnel in around 1/4 cup of pretty sand and toss in a few tiny seashells. Tie a ribbon and this message at the top. I received this as a gift last year and really love it.

    Now, what did I do with all the great deals this week? I bought Team Licensed Fleece at Jo-Ann for 25% off and made the simple no-sew fleece blanket for my BYU-loving husband. (here's a little tutorial from Project Linus With the little extra that was part of the piece I was buying I also made him a team pillow. He's going to love these and it was pretty simple to do. There's a man-gift for you.

Friday, November 13, 2009

Santa's Cookie Tray

Santa Cookie Tray

The other day I found an old frame I had purchased at a thrift store with the intention of making it into some sort of serving tray. With Christmas fast approaching, I thought the perfect idea would be a fun tray to leave Santa's cookies and milk on. (I apologize for the glare on some of these. Rotten time of day to get a good picture.) Supplies needed: 1 thrifted frame (with the glass still in) big enough to hold a small plate of cookies and glass of milk Paint-acrylic or spray Scrap paper in Christmas colors/themes Letter stickers, die cuts, or computer to make title Adhesive Trim, stamps, embellishments as desired First rough up your frame for easier painting. I lucked out that the gold trim on this one was just painted gold. :) Next paint your desired color. I used Ebony from Americana paints (which you can find at Hobby Lobby, Roberts Arts and Crafts, etc.) While that's drying, take the cardboard backing and start piecing together your paper. It was easier for me to think of this part as making one giant Christmas card. When you're doing this, remember to leave yourself a slight margin all the way around to prevent your work from being covered up by the frame. I used only supplies I had on hand and got to revisit a favorite technique-embossing. I didn't have any sparkly ribbon so I found a snowflake stamp in my collection. First stamp the image with Versa Mark ink (a clear pigment ink) then sprinkle with silver embossing powder. Gently tap the board over a scrap paper to remove excess powder and melt the powder with a heat gun. Repeat the process for the stars on top of the Christmas trees. When you're satisfied with the way it looks, pop it into your dried frame. When I was finished, I discovered a pleasant surprise. Not only will this make a darling tray to hold Santa's goodies, but will be a fun decoration to use the other 24 days of December! (I bet you could come up with something fun for a cute Thanksgiving tray, too!)

Wednesday, September 23, 2009

Fluff and Stuff for little Girls

My kids had a birthday party to attend the other day for a little friend of ours. Ever since I've dived more heavily into crafting, I hate buying store-bought presents. Especially since you can't get much for the amount I'm willing to spend. The little girl was having a costume party to celebrate and that gave me an idea. Being newly 5 she's into all things princess-y and girly. I found this cute wand (with an easy-to-follow tutorial) at Little Birdie Secrets and knew I was onto something. If a princess has a beautiful wand, what else does she need to go with it? A beautiful fluffy tutu of course! (Tutorial coming soon!) A few dollars at hobby lobby and a couple of hours later I had dress-ups made for the princess that she is-a curly ribbon wand, fluffy tutu, and with my extra curls I was able to pull a cute little korker bow together. Sigh...I love crafting.

Monday, August 3, 2009

Fabric Flowers

I have seen different versions of fabric flowers all over the blog-o-sphere and have tried some. This one from Pink Paper Peppermints , however, is my favorite so far. It was so easy to whip up and a fun addition to anything-bags, pins, magnets, clothes. Having little girls though, my favorite use is for hair accessories. Like these sweet little darlins' I made for a friends new baby girl. Get the how-to here. Instant craft gratification. My favorite! (One small note: My flowers here are half the size of the tutorial. For this particular friend, small and delicate was the better option.)

Thursday, July 2, 2009

A Simple Gift

Today was my 1st graders last day of school and we wanted to do something special for her teacher. This teacher has fostered such a great love of general learning and specifically reading in my daughter. Normally I like small, simple, inexpensive things, but this year I opted for a nice gift card to Barnes and Noble. Being a crafter, I couldn't just let it go at having my daughter hand her beloved teach a gift card! So-with a little inspiration from my mom and Skip to My Lou, I came up with this cute little flower/sucker bouquet. I cut my flowers using the Cricuit and the George and Basic Shapes cartridge. The suckers are homemade, but you could easily use store bought suckers. Stick the suckers down the middle of the flowers and into a floral foam piece inside the pot. I didn't have any ribbon that coordinated with the flowers, but I did have a different piece of patterned scrap paper that would work. I trimmed it to fit the rim of the flower pot and adhered it with double sided tape. This in itself would make a cute little gift for a friend, teacher, coworker, etc. If you want to add a little gift card though, take a plastic fork, stick your card in, and push the fork handle into the foam as well. As you can see, it looks like the card from the florist.
Cute, easy, and fast. (How fast? I did it this morning as my daughter was getting ready for school. Can we say procrastinator??:) )

If you want to make your own suckers, here's the recipe:

Supplies you'll need:

-candy thermometer

-sucker molds

-sucker sticks

Suckers:

1 c. sugar

1/3 c. light corn syrup

1/2 c. water

1/2 tsp. food coloring (or as desired)

1/2 tsp. flavoring

For fruity flavors: 1/8 tsp. citric acid crystals dissolved in 1 tsp water

Set up sucker molds with sticks on marble slab or aluminum foil. Spray with non-stick cooking spray. Set aside.

Boil water, sugar and corn syrup til about 290 (just before hard crack stage). Remove from heat; add food coloring and stir. Add citric acid if desired. Add flavoring. Stir and pour carefully into sucker molds and allow to cool. Remove gently from molds. Wrap individually or place in Ziploc bag. Enjoy!

Friday, June 26, 2009

Easy Baby Gifts (with tutorial and free pattern)

First, we have a felt toy. This can be used in a variety of styles. There is a basic oval shape which can be used for a bear or a spaceman (see below) or a monkey or a rabbit. Endless possibilities...First gather yourself a bunch of felt. I used for a template my Creative Memories cutting templates and traced them with a fading fabric marker. The measurements of the ovals are: Bear is 6 3/4" x 4 1/2" and Spaceman is 5 3/4" x 3 1/2" (starting dimensions).
Before cutting begins, draw a single antennae or ear for what ever you're making. Cut around the shape, but only until you can match up the widths' ends and trace around the one cut out antennae or ear so that you have a matching set (I use this method because it's hard to get a matching set, especially free-hand as I like to do).
Cut out the same shape out of another color for the back, but do not cut out the smaller inner circle. Choose a piece for the face (it doesn't have to be pretty) and free-hand cut out some hair for the spaceman, or none for the bear. Then line them all up, pin together and front sew them all together with just a tiny seam. Draw a face on the felt with your fading fabric marker and embroider it BEFORE you sew the piece together.
Place right sides together, pin and sew with a 1/4" seam.
Stuff it (sorry, switching to the bear) with Poly-fil AND the secret ingredient...a used baby-wipes wrapper or other crinkle-y, plastic-y type item (not shredded, whole, for safety) and give the baby the noise he wants!
Second item: a crocheted baby wash-mitt.
Using COTTON yarn (I used The Original Sugar 'n Cream cotton yarn in Cool Breeze Ombre) and a size H hook, chain 21.
Turn and single crochet (sc) in first chain from hook and in every chain across.
*Chain one, turn and single crochet in first sc from hook and in every sc across.
Repeat from * approx. 44 more rows (total 46) or the measurement of the adult had it will fit with the crocheted strip folded in half. 
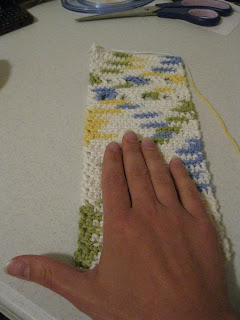
After the strip is at the desired length, do not finish off, but leave approximately 32" of extra yarn attached. Pull it through the last sc so the strip doesn't unravel. Thread the yarn into a large eye needle, fold the strip in (over the hand) and whip stitch up on side. So that we don't have to cut the yarn and weave in multiple ends, lead the yarn over the top of the mitt uniformly in the loops all the way across, then whip stitch down the other side. Weave in any stray ends and your mitt is done. Put it over the top of a bottle of baby wash and it makes a charming gift. (If you want a bit more of a decorative touch, I replaced two sets of two rows with one row each of double crochet following a pattern (from the regular sc row) chain two, double crochet in first sc from hook. Double crochet in next two sc, *chain two, skip next two sc, double crochet in next two sc. Repeat from * three more times (end) then continue the sc pattern. I only recommed the decoration for the back of the mitt and not the front where you'd use to wash baby. )
email us with any questions: twiddlethumbs@rocketmail.com
--C

Monday, June 1, 2009

Sweet Little Tissue Holders

I love these little tissue holders and have wanted to make one for some time. I found a super easy tutorial on Skip to My Lou. Honestly I used the tutorial once and didn't need it again. So easy. Here's mine: Cut 2 pieces of fabric 6 1/2" x 7" each and iron Place right sides together and sew around the edges using a 1/4" seam. Be sure to leave a 1 1/2" opening for turning. (I'm sorry about the poor quality of the above photo. They get better.) Turn out and use your scissors to help push out the corners. Iron again. Fold edges in towards the middle. Allow them to overlap about 1/4" Sew 1/4" seam down both sides. (This will close your gap from turning it right side out.) Turn right side out. Add embellishments if you a little extra. Fill with travel tissue pack. How simple is that?! Love it!