


 To make your own draw a heart. It can be any size, but it should be broad with a shallow middle dip. Here's mine with my hand to show scale.
 Take your heart and rotate it as you trace it as each of the leaves (you can do three or four). I used a disappearing fabric pen. Then I cut it out with a rotary cutter.
 Here is the whole cut out. You can kind of see the traced lines here. This green felt was left over from a Christmas craft and was purchased in a package I got at Roberts Craft. The wrinkles steamed out easily.
 Next I stamped my message (as I am probably the only crafter who has not yet used freezer paper) with white acrylic paint.
 Next I added a little decorative flourish with white embroidery floss. I used one of my favorite stitched called the split stitch.
 To balance out the flourish, I added a red heart button. You could add a leprechaun-themed charm or gold buttons here instead.
 To finish off the pillow, I pinned wrong sides together and used a zig stitch around the edge. Stuff this pillow lightly or it looks all warped and you lose the shamrock shape. I had to work a bit to get the stuffing to look just right. I closed it with the zig stitch when I was done.
 From start to finish, this easy project took me just under two hours. If you have any other fun ideas for a good phrase for this pillow, leave it in the comments.
-C


 Seller's link
  Seller's link
  Seller's link
  Seller's link


 I did not want to buy a $14+ backpack for my new preschooler, so when I saw a colorful canvas bag I decided that this would be perfect for my little girl. It didn't take much convincing her. She loves it! The solid shapes are painted with regular acrylic paint and outlined with fabric paint. (Before you paint on a canvas bag, make sure you have a piece of cardboard inside the bag to prevent the paint from seaping through to the other side) The buttons are attatched with glittery fabric glue. The fluffy pink trim was simply attached with hot glue and it has held up perfectly.

 First gather yourself a bunch of felt.


 Then line them all up, pin together and front sew them all together with just a tiny seam.
 Draw a face on the felt with your fading fabric marker and embroider it BEFORE you sew the piece together.
 Place right sides together, pin and sew with a 1/4" seam.


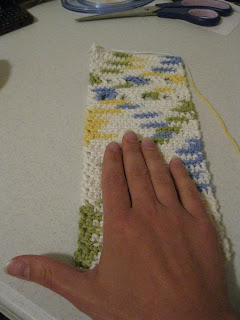 After the strip is at the desired length, do not finish off, but leave approximately 32" of extra yarn attached. Pull it through the last sc so the strip doesn't unravel. Thread the yarn into a large eye needle, fold the strip in (over the hand) and whip stitch up on side.
 So that we don't have to cut the yarn and weave in multiple ends, lead the yarn over the top of the mitt uniformly in the loops all the way across, then whip stitch down the other side.
  Weave in any stray ends and your mitt is done. Put it over the top of a bottle of baby wash and it makes a charming gift.

 I used that old taupe cover as a template to cut out my felt. I kept the width the same, but increased the length a bit to allow for folding it in half, etc.
The embellishment is just embroidery and a bit of applique. It took me just over twenty minutes of actual work to make this happen.
I used that old taupe cover as a template to cut out my felt. I kept the width the same, but increased the length a bit to allow for folding it in half, etc.
The embellishment is just embroidery and a bit of applique. It took me just over twenty minutes of actual work to make this happen.


