Today was my 1st graders last day of school and we wanted to do something special for her teacher. This teacher has fostered such a great love of general learning and specifically reading in my daughter. Normally I like small, simple, inexpensive things, but this year I opted for a nice gift card to Barnes and Noble. Being a crafter, I couldn't just let it go at having my daughter hand her beloved teach a gift card! So-with a little inspiration from my mom and
Skip to My Lou, I came up with this cute little flower/sucker bouquet.
I cut my flowers using the
Cricuit and the
George and Basic Shapes cartridge. The suckers are homemade, but you could easily use store bought suckers. Stick the suckers down the middle of the flowers and into a floral foam piece inside the pot. I didn't have any ribbon that coordinated with the flowers, but I did have a different piece of patterned scrap paper that would work. I trimmed it to fit the rim of the flower pot and adhered it with double sided tape. This in itself would make a cute little gift for a friend, teacher, coworker, etc. If you want to add a little gift card though, take a plastic fork, stick your card in, and push the fork handle into the foam as well. As you can see, it looks like the card from the florist.
Cute, easy, and fast. (How fast? I did it this morning as my daughter was getting ready for school. Can we say procrastinator??:) )

If you want to make your own suckers, here's the recipe:
Supplies you'll need:
-candy thermometer
-sucker molds
-sucker sticks
Suckers:
1 c. sugar
1/3 c. light corn syrup
1/2 c. water
1/2 tsp. food coloring (or as desired)
1/2 tsp. flavoring
For fruity flavors: 1/8 tsp. citric acid crystals dissolved in 1 tsp water
Set up sucker molds with sticks on marble slab or aluminum foil. Spray with non-stick cooking spray. Set aside.
Boil water, sugar and corn syrup til about 290 (just before hard crack stage). Remove from heat; add food coloring and stir. Add citric acid if desired. Add flavoring. Stir and pour carefully into sucker molds and allow to cool. Remove gently from molds. Wrap individually or place in Ziploc bag. Enjoy!


 There's still some journaling to complete, but I want my husband's help. Husbands are not easy to pin down for crafting time.


 When I ran out of pages in the album, I just cut some creme colored cardstock to size, punched holes, unscrewed the posts and added the pages.
 On the final page, I used put a photo on the back cover to utilize all available space. Most photos were 4x6 but I did have a few printed as 5x7s.
 This is a clock made of resin, but as soon as I saw it I knew I could recreate it in paper. This is made up of 48 strips attached strategically to create this wavy design.


 Next, I took one of the joined pieces, placing a Glue Dot on the outside of the strip at the 3 1/2" mark and the 9 1/2" mark (see red indicators) and stacked the next piece on top. I repeated this with the rest of the pieces.
  After all it's all stacked in a row, it'll look like this.


 I like this in it's simplicity but it could be embelleshed in a lot of fun ways. It could probably also be made into a clock if you added another twelve strips, opening the center more.
 To download the image for the God Bless America iron on click
  To download the image for the America the Beautiful iron-on click
 First gather yourself a bunch of felt.


 Then line them all up, pin together and front sew them all together with just a tiny seam.
 Draw a face on the felt with your fading fabric marker and embroider it BEFORE you sew the piece together.
 Place right sides together, pin and sew with a 1/4" seam.


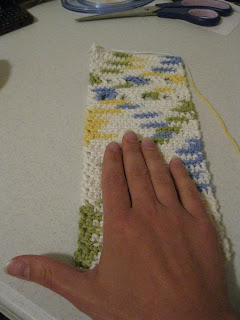 After the strip is at the desired length, do not finish off, but leave approximately 32" of extra yarn attached. Pull it through the last sc so the strip doesn't unravel. Thread the yarn into a large eye needle, fold the strip in (over the hand) and whip stitch up on side.
 So that we don't have to cut the yarn and weave in multiple ends, lead the yarn over the top of the mitt uniformly in the loops all the way across, then whip stitch down the other side.
  Weave in any stray ends and your mitt is done. Put it over the top of a bottle of baby wash and it makes a charming gift.





 Posts
Posts


