Saturday, November 6, 2010

Easiest Valance Ever!

Last night I whipped up a set of valances for our living room windows! They are sooo fast and easy that I thought I'd do a quick tutorial....
1. Measure your window width. Mine was 63"
2. Cut your fabric 2" wider to account for a 1" seam allowance on each side. I typically like my valance to drop 18". You will need to double the amount of fabric for the drop. So, basically I cut my fabric 65" wide x 36" tall.
So, here is my fabric all cut. I drew a little diagram on the picture. Basically, you will hem the sides first, then put the fabric right sides together and sew it into a tube. Turn it right side out and iron it. You will loop the tube over your rod. Then take two pieces of ribbon. I like mine to be 15" long. So, I cut them 30" and sewed the ends together. then slip them over the rod and slide them into place. It's as simple as that!
If you have any questions, leave a comment and I'd love to answer any questions for you.
-Anisa
(P.S. Sydney... we need to make some for your new house now!)

Wednesday, November 3, 2010

Tip Top Cake Shoppe

One of the hardest things for me about moving to St. George is not having my friend Jacinda from Tip Top Cake Shoppe to make my kids birthday cakes for me. I took classes from her so I have learned how to decorate cakes, but I'm just not that good at it... and it's not my favorite craft! Here is the craft that I made for my 2 year old..... It's nothing compared to this cake Jacinda made for my niece.... Or this one she made for my other son.... I have seen other people decorate cakes and they just aren't as creative as Jacinda.... I'm telling you!!! so, if you live in the Salt Lake Valley, you can have Jacinda make an awesome creation for you. Right now she has a CONTEST going on where she will make 24 cupcakes for you... super yummy and you'd have Thanksgiving dessert taken care of! Check out the details on her blog. -Anisa

Tuesday, October 26, 2010

My Best Halloween Tip

I happen to have a fair amount of training in theater make-up and as a result, own a lot of theater make-up. I've painted faces for Halloween for many years now and I want to share my best secret of making all your hard work stay in place.

The secret is loose face powder.

My son, below, has been a tiger for his third (non-consecutive) year now and this tip has yet to fail us. (in fact, my daughter has has some white swirls on her face since Saturday that I had forgotten about due to her hair covering them up. Yikes!) Here's how it's done.

You take your loose powder and shake it on to a non-fluffy powder puff in excess. You press that powder on to the make-up firmly without smearing. Get it on every whisker, patch, scar, whatever. (unless you're making a ghost or vampire, you're going to want the powder to be skin colored)

Next, you'll need a powder brush. You'll want one dedicated to this because the last thing you want is remenants of grease paint getting onto your own skin later because you used your expensive brush set. Just dust the powder off with the brush and you're done. The make-up will stay all through the school day and trick or treating. Even if you're just doing a little puppy dog nose on your baby, you'll want something to set that black eye-liner of yours or he just won't look complete for pictures. :)

--C

Friday, October 22, 2010

Diaper Bag

It's been a long time since I posted but with good reason.  I promise. :)  Baby #4 is on her way and will be here in a matter of weeks.  (Yikes!)  We've also decided that it is time to sell the house.  Sooo between pregnancy and moving/house selling prep, life's been crazy. 

Lately I've been in a crafting frenzy, though.  Nesting?  Probably.  I have a long list of projects I'd like to do before the baby gets here and luckily have been able to get quite a few of them done.  One of those projects is this bag from Make-It-and-Love-It.  I really wanted a new diaper bag and loved the messenger style of this one.  Plus I thought the stroll straps would come in handy.   


With a little help from my super crafty mom, I added some pockets.  (Thanks Mom!)


It still needed a little something so I cut out a flower from the lining and appliqued it on the front.


One suggestion I'd make, especially if you are using a lighter weight fabric, add some sort of interfacing to help the bag hold it's shape better. 
It was an easy tutorial to follow and I am in love with the finished product. 

And a huge shout out to my hubby-he had to help me with the snaps.  Between my weak arms and a few mistakes, he helped quite a bit with putting those little suckers in. Love you babe!

Saturday, October 16, 2010

My first try at Glazing

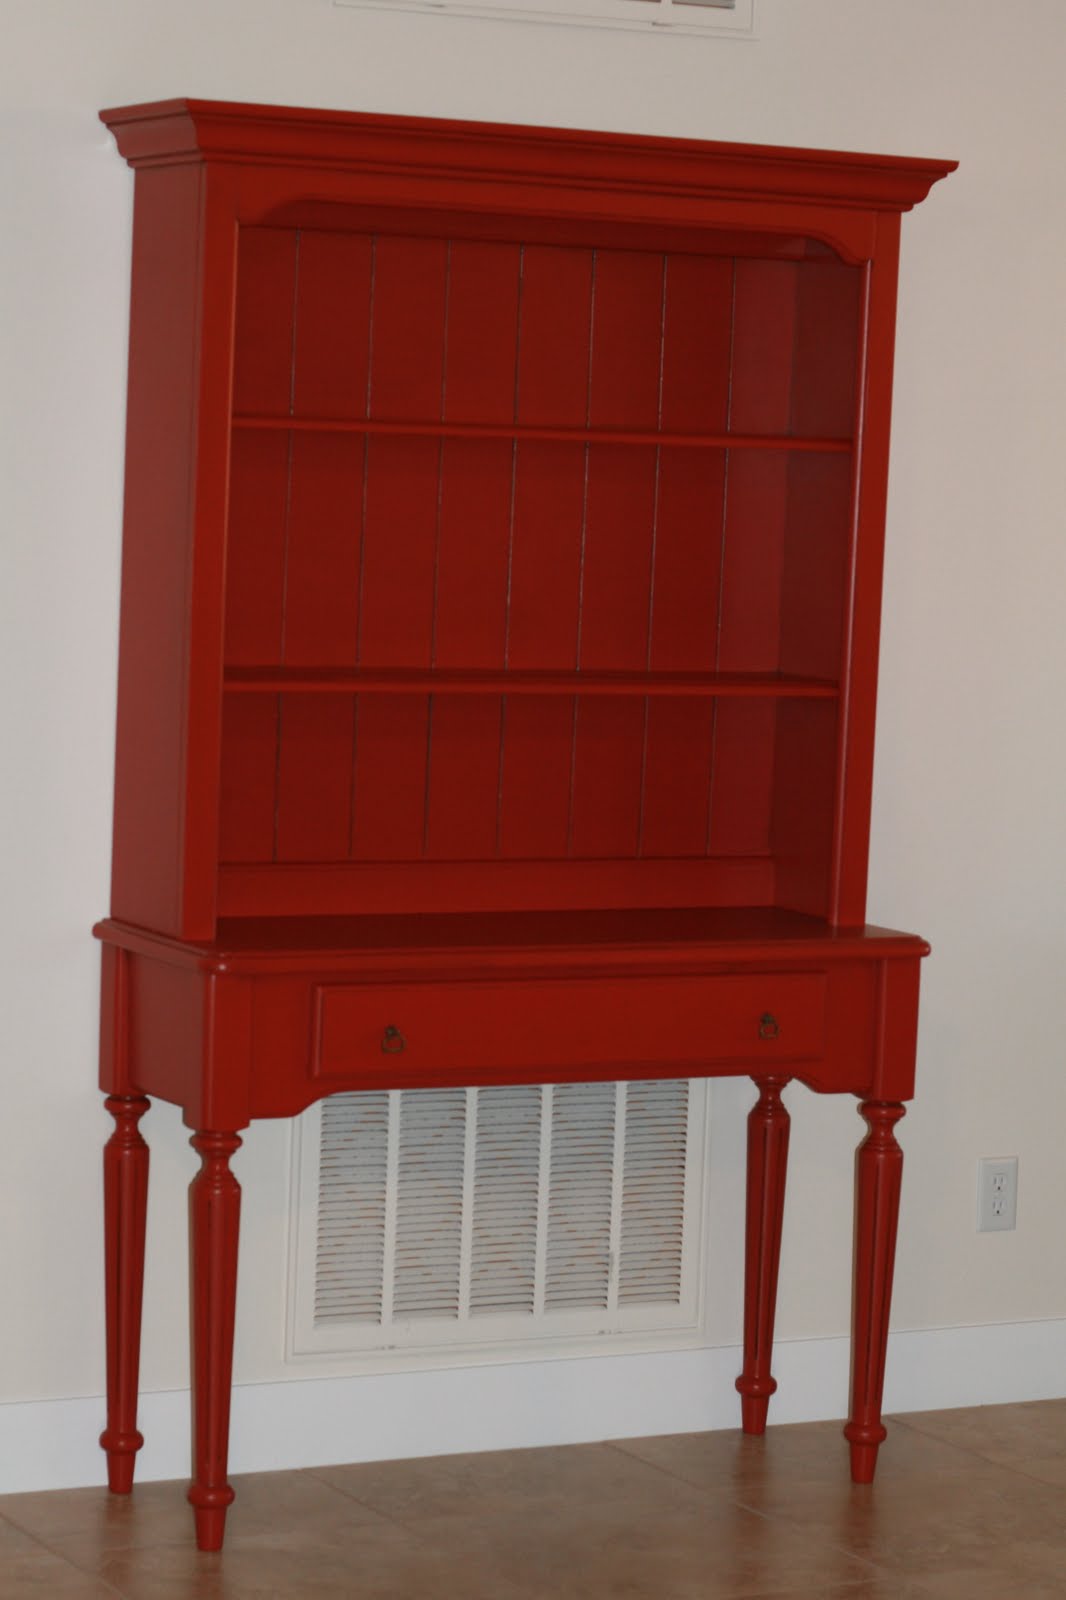
I love to paint furniture... and I have quite often. I usually spray paint and then sand and distress the furniture.
However, my latest project was a little different. I bought this hutch at a garage sale. I wanted to paint it red and I knew that if I distressed it, the green would show through. So, I came across this tutorial on glazing on All Things Thrifty. I painted with a brush this time because I didn't want the dusty mess of spray paint.
So this green ( I really didn't like the color... it was a little outdated) hutch transformed into this red hutch! I love the red.... Here are some close-ups of the glazing. I did a dark brown instead of black.... I was a little nervous my first time around. But I still love the way it looks! -Anisa

Thursday, September 16, 2010

My first craft in the new house

So, many of you know that I moved... that's why I have been posting or crafting for awhile... too busy packing and unpacking. But sometimes crafting becomes a necessity.
So, here is our computer desk that is built into our kitchen... love having the computer in the kitchen. And you'll notice the nice stack of papers on the desk. I have no where to put my kids homework, calendars, etc. I forgot to send something to preschool with my son because the calendar was buried in the bottom of the stack of papers. Stainless steel fridges are not so good for magnets. And our fridge in encased by wood so I can't even hang stuff on the side.
So in the space below the window, I made a board to hang calendars and homework and reminders on. I simply took a piece of wood (mine was an old piece I had lying around). And I glued clothes pins to the wood. Then I mod podged a piece of scrapbook paper on the front of the clothes pins to decorate them up a little. So now I have a place to hang my calendars and hopefully I won't forget to send anything to preschool again. (Now what can I do to keep from forgetting to pick him up from preschool?)
-Anisa

Friday, August 20, 2010

Not Quite a Rant: Sewing on Knit

A small echo of Anisa's knit post, here. I never know what is going to inspire me. I was browsing in a local craft store and saw that American Craft ribbon was on sale for $1 a spool. The next thing I knew, I was buying several, then going to Target to find a white t-shirt to stitch it on for my daughter. (Honestly, I think this ribbon is too cute to scrapbook with) I had appliqued felt onto knit before, on a small scale, but this was a new experience. Knit is very unforgiving. I pinned the ribbon onto the shirt using small spacing, doing what I could to not stretch the knit at all. Then I sewed down one side, then the other, using a very close stitch.You can see it's not perfect, but it was simple, inexpensive and she loves it. The flower is my favorite part. I folded three segments of ribbon into a flower shape and hand-sewed those together. Then I added an X of another ribbon style and a matching button and hand-stitched those to the shirt.

I love quick-fix inspiration.

Maybe that's why my family dinners have lacked sparkle. My hubby does all the shopping and really, does anyone get inspired looking into their own pantry? :)

-C

Wednesday, August 18, 2010

I guess I've always been crafty

My mom has these cute little counted cross-stitch thingys hanging on a bulletin board in her guest room...
I made them for her when I was young.... I'm guessing in my Tween years. I guess I've always liked to do crafts stuff. (funny thing is... I don't think I've ever done any counted cross-stitching since).
-Anisa