Friday, October 22, 2010

Diaper Bag

It's been a long time since I posted but with good reason.  I promise. :)  Baby #4 is on her way and will be here in a matter of weeks.  (Yikes!)  We've also decided that it is time to sell the house.  Sooo between pregnancy and moving/house selling prep, life's been crazy. 

Lately I've been in a crafting frenzy, though.  Nesting?  Probably.  I have a long list of projects I'd like to do before the baby gets here and luckily have been able to get quite a few of them done.  One of those projects is this bag from Make-It-and-Love-It.  I really wanted a new diaper bag and loved the messenger style of this one.  Plus I thought the stroll straps would come in handy.   


With a little help from my super crafty mom, I added some pockets.  (Thanks Mom!)


It still needed a little something so I cut out a flower from the lining and appliqued it on the front.


One suggestion I'd make, especially if you are using a lighter weight fabric, add some sort of interfacing to help the bag hold it's shape better. 
It was an easy tutorial to follow and I am in love with the finished product. 

And a huge shout out to my hubby-he had to help me with the snaps.  Between my weak arms and a few mistakes, he helped quite a bit with putting those little suckers in. Love you babe!

Saturday, October 16, 2010

My first try at Glazing

I love to paint furniture... and I have quite often. I usually spray paint and then sand and distress the furniture.
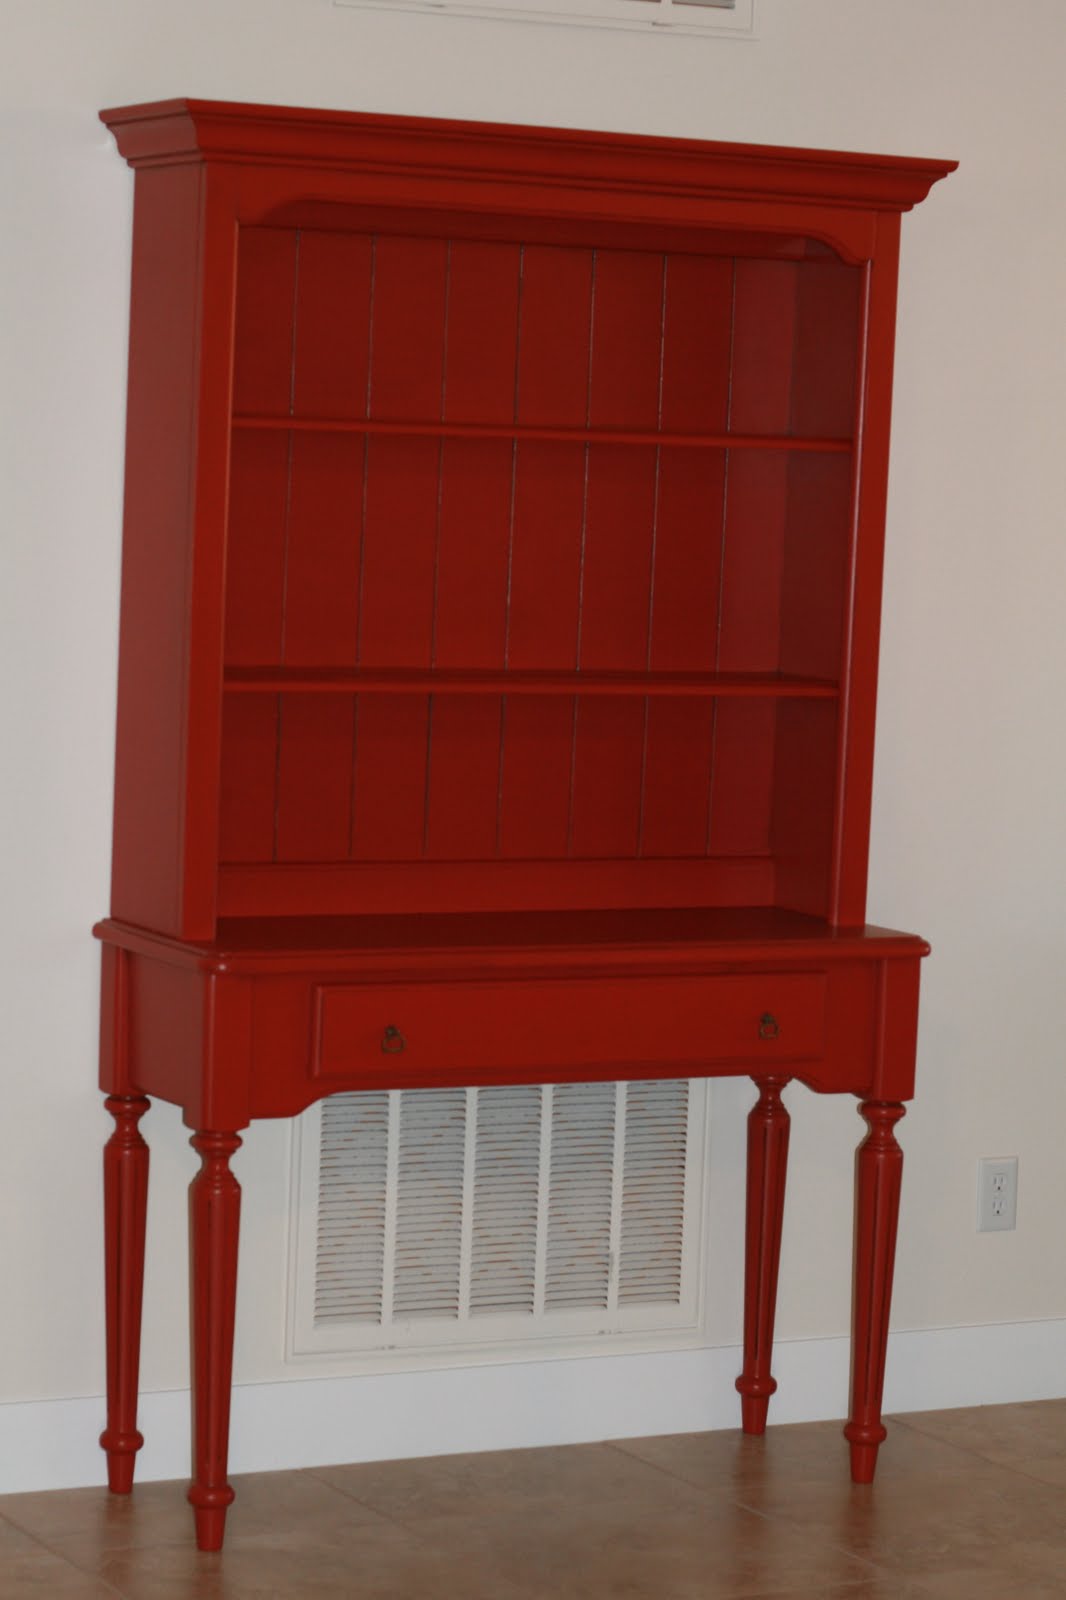
However, my latest project was a little different. I bought this hutch at a garage sale. I wanted to paint it red and I knew that if I distressed it, the green would show through. So, I came across this tutorial on glazing on All Things Thrifty. I painted with a brush this time because I didn't want the dusty mess of spray paint.
So this green ( I really didn't like the color... it was a little outdated) hutch transformed into this red hutch! I love the red.... Here are some close-ups of the glazing. I did a dark brown instead of black.... I was a little nervous my first time around. But I still love the way it looks! -Anisa

Thursday, September 16, 2010

My first craft in the new house

So, many of you know that I moved... that's why I have been posting or crafting for awhile... too busy packing and unpacking. But sometimes crafting becomes a necessity.
So, here is our computer desk that is built into our kitchen... love having the computer in the kitchen. And you'll notice the nice stack of papers on the desk. I have no where to put my kids homework, calendars, etc. I forgot to send something to preschool with my son because the calendar was buried in the bottom of the stack of papers. Stainless steel fridges are not so good for magnets. And our fridge in encased by wood so I can't even hang stuff on the side.
So in the space below the window, I made a board to hang calendars and homework and reminders on. I simply took a piece of wood (mine was an old piece I had lying around). And I glued clothes pins to the wood. Then I mod podged a piece of scrapbook paper on the front of the clothes pins to decorate them up a little. So now I have a place to hang my calendars and hopefully I won't forget to send anything to preschool again. (Now what can I do to keep from forgetting to pick him up from preschool?)
-Anisa

Friday, August 20, 2010

Not Quite a Rant: Sewing on Knit

A small echo of Anisa's knit post, here. I never know what is going to inspire me. I was browsing in a local craft store and saw that American Craft ribbon was on sale for $1 a spool. The next thing I knew, I was buying several, then going to Target to find a white t-shirt to stitch it on for my daughter. (Honestly, I think this ribbon is too cute to scrapbook with) I had appliqued felt onto knit before, on a small scale, but this was a new experience. Knit is very unforgiving. I pinned the ribbon onto the shirt using small spacing, doing what I could to not stretch the knit at all. Then I sewed down one side, then the other, using a very close stitch.You can see it's not perfect, but it was simple, inexpensive and she loves it. The flower is my favorite part. I folded three segments of ribbon into a flower shape and hand-sewed those together. Then I added an X of another ribbon style and a matching button and hand-stitched those to the shirt.

I love quick-fix inspiration.

Maybe that's why my family dinners have lacked sparkle. My hubby does all the shopping and really, does anyone get inspired looking into their own pantry? :)

-C

Wednesday, August 18, 2010

I guess I've always been crafty

My mom has these cute little counted cross-stitch thingys hanging on a bulletin board in her guest room...
I made them for her when I was young.... I'm guessing in my Tween years. I guess I've always liked to do crafts stuff. (funny thing is... I don't think I've ever done any counted cross-stitching since).
-Anisa

Wednesday, August 11, 2010

Vinyl Chandelier

I purchased a rather large square frame at my local thrift store awhile back. It's about 18"x18". I bought it when I was obsessed with putting vinyl on frames.... but never got around to finishing it. I even bought the Home Decor Solutions Cricut cartridge just so I could make this frame.... anyway, I am moving so I thought it would be a good opportunity to finish up a couple of projects before I move. I just put the vinyl directly on the glass and I love it that way... but it would be really cute with a fun piece of fabric mounted behind it as well!!!
I think I saw this idea on someone else's blog, so if it was yours... please feel free to leave a comment so people know where the original idea came from!!!

Friday, July 23, 2010

Button/Embellishment Storage

I have been trying to make my scrapbooking supplies more mobile... so that I can scrapbook someplace other than in my craft room. I have always used these divided containers for my button and embellishment storage.
But they drive me crazy!!! I stick them in my craft bag and all the buttons slide around and get mixed up. So, I put my thinking cap on and came up with a solution!!! I cut a piece of chipboard the size of the lid. Then I cut a piece of batting the same size. Then I cut a piece of fabric about 1" larger around all sides. I then simply hot glued it together and glued it inside the lid of the box. Ta da!!! It totally works!!! No more sliding around and mixing up of buttons. It is a tight squeeze to close it, but that's okay!!!
To hide the back side of the chipboard, I cut a piece of fabric and modpodged it on the front. Then I modpodged a border of scrapbook paper around the edge and stamped acrylic paint to label what was inside. I'm sure I could have decorated and embellished the outside a little better, but oh well!!! The important thing is that it is totally functional and solves the problem of everything getting mixed up inside!!!
-Anisa

Wednesday, July 21, 2010

July Wood Craft Classes

I have one craft class this month... Wed. July 28th from 6-9 p.m. The last trio in the series is...
Sunflower/Crow Trio: $10
It is also CRAFT MAKE-UP month!!! If there are any trios (or other crafts that you missed), let me know and we can make them up!!! Click on this link to see all of the other crafts we have done this year.
-Anisa
