We are all participating in the Seedlings Craft Boutique today!!! Come and check out our stuff.


We have started something new and fun!!! We are doing a Countdown with Crafts to help you get ready for the Holidays. For my first project, I bring to you and fun and easy throw pillow. If you go to Joann Fabric and Craft Stores this week, they have their Soft n' Crafty pillow forms on sale for 40% off. I made this pillow by taking basic white fabric. I pinned the ribbon on to the fabric, then sewed it on.... make sure you sew down both sides of the ribbon. I used ribbon from my stash, but scrapbook ribbon is also on sale at Hobby Lobby this week. After I made this pillow, I saw this post on Ucreate from the guest blogger Polka Dot Chair for a skirt just like my pillow!!! Weird Deja Vu. Check out her tutorial, she does it a little differently.

Dates:
Thursday, Nov. 12th 6-9pm
Tuesday, Nov. 17th 6-9pm
Wed. Nov. 18th 1-3pm and 6-9pm
***Tuesday, Nov. 24th in St. George, UT from 6-9 pm***
For the St. George class, I need to know what you would like to make by Wed. Nov. 18th.
 Wreath- $25 (just in case you didn't get to make one last month. makes a great christmas gift. Can be personalized with last name.)
 Elf- $18 (He can be a yard stake or will look great sitting on a shelf... I just make a base for him and a smaller sign)
 Nativity- $17
 Angels- $10 (if you need the stands, I've raised the price to $5 for 3 stands)
Please try to let me know by Friday, Nov. 6th what you would like to make.
If you have any questions, don't hesitate to email me. anisascholes@gmail.com Anisa
 However, the acrylic stamps were on sale at Michael's and they had a great selection of said flourishes.
 And the finished piece (sorry about the bad lighting) and I'm really pleased with it.
  Remember to check us out on Tuesdays for our Countdown with Crafts posts, all the way till Christmas after we get a chance to check the ads. Look for our other posts as well.
 So, the ribbon ones are totally cute, but you can't forget my favorite bucket of all..... my thread bucket. I love this thing. I keep it next to my sewing machine so when I clip off the thread I have a quick place to throw it!!! -Anisa:)

My bucket project ended up not being a craft but an organizational project. I had been reading Pretty Organized Palace's blog and one post in particular caught my attention. She was sharing some fun ways to cozy up the home for fall and winter. With my inspiration starting there, I headed to my local Hobby Lobby and purchased this large bucket/basket. At home I filled it with all my yummy yarn for crocheting (and one day hopefully knitting) and placed it by the fireplace. I love how it makes my family room just that much more comfy cozy with the bonus I have yarn storage in plain sight.
 -Ang
-Ang
Check out these darling buckets that one of our readers... Shellie... sent into us. Super cute storage. Here's what she says about them,
"Here is what I have been doing with buckets. I only have 3 done. I still want a ribbon one and thread etc… I just bought some for a couple of dollars and spray painted them, cut out vinyl on my Cricut for the letter."
 Way to go Shellie!
 I started with this window that I had purchased for $1 at a yard sale. It was white and I spray painted it black. Kind of a little boring by itself.
 I was over visiting Trey and Lucy awhile back and saw this cute idea. And what do you know.... a few weeks later, I found this wreath at a yard sale for $2! I totally knew what to do with that!
 On the wall above the towel rack, I was thinking of doing some vinyl of some sort. But you know how much I love wood and all of my wood crafts.... So what I did instead, was I used my Cricut and the Storybook cartridge (which I borrowed from a friend in July and really need to return). I cut the little bird swirly thing out as big as I could do it.... 12x24. Used that as a pattern and cut it out of wood. It's fun to have a nice black silhouette but actually have some dimension to it. By the way, I will be selling these at the Seedlings boutique coming up in a couple of weeks!!! Or, you could buy one from me directly if you're interested, just send me an email at anisascholes@gmail.com
 And here's the semi-final product. I'm thinking it needs a little color, so I'll probably get some ribbon to add to the wreath and what-not. Leave a comment and let me know what you think!
 -Anisa
 Next look on the internet or at your own photos or create something that can be printed. I wanted to make something special for my friend, Ane, so I looked at pictures from New Moon for Jacob Black.
 Photoshop comes in handy here, but if you don't have it...later.
When you open up the photo you want to use, click on the Crop tool. You can set the shape of the crop it will do to the dimentions of your tile (that you measured, remember?) The orange arrow is pointing at this feature.
Photoshop comes in handy here, but if you don't have it...later.
When you open up the photo you want to use, click on the Crop tool. You can set the shape of the crop it will do to the dimentions of your tile (that you measured, remember?) The orange arrow is pointing at this feature.

 At this point, you can attach a bail or some other type of loopy finding on to the back of the tile so that you'll be able to wear it. You'll need a serious glue for this. E6000 was used here.
 You can touch up the paint on the sides now or later, if you want. Or you can have a more distressed look.
  It is applies very thickly.
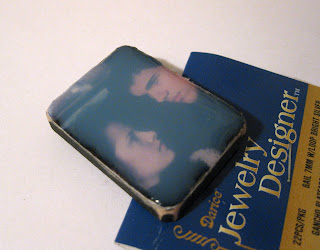
 After it's all filled in, it'll look all hazy like this. It's not ruined, it just needs to dry. Make sure it's level (this would be a good reason NOT to put your loop on the back yet, but mine is propped up on one end to make it lie flat).
 Now walk away!!!
Do not allow yourself to be tempted to test to see if it's dry. The safest bet is leave it alone for the rest of the day and/or night, otherwise your project will be ruined by fingerprints, dents, ripples, etc.
When it's done it'll be all shiny and will not crack (like embossing powder).
Now walk away!!!
Do not allow yourself to be tempted to test to see if it's dry. The safest bet is leave it alone for the rest of the day and/or night, otherwise your project will be ruined by fingerprints, dents, ripples, etc.
When it's done it'll be all shiny and will not crack (like embossing powder). 


